Thông thường,
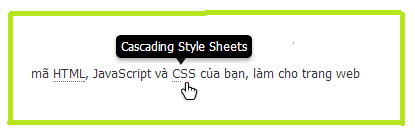
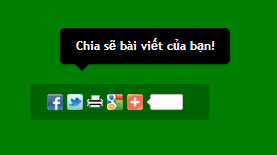
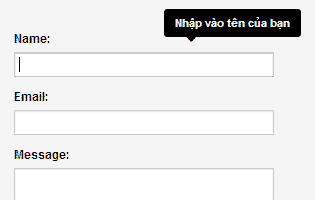
Tooltip được sử dụng để trình bày một lượng nhỏ nội dung được ẩn đi (chủ yếu là để giải thích một cái gì đó), mà khi người dùng di chuyển con trỏ chuột qua (hoặc nhấp chuột) thì sẻ được hiển thị.
Hôm nay, xin chia sẽ một plugin hiển thị tooltip khá hay được tìm thấy trên google, với các tính năng chính như responsive hiển thị tốt trên thiết bị di động, bạn cũng có thể định dạng tooltip bằng các thẻ html như in đậm, in nghiêng,... Việc cài đặt và sử dụng rất đơn giản, chỉ cần copy mã
css, javascript vào template và gán thuộc tính
title="nhập tooltip của bạn" và
rel="tooltip" vào bất kỳ thẻ nào trong mã
html của bạn
CSS Tooltip
Bạn có thể xây dựng kiểu hiển thị cho riêng mình hoặc sử dụng đoạn mã css dưới đây:
/******* TOOLTIP*******/
#tooltip {
 font:.9em/1.6 Tahoma,Sans-serif;
 text-shadow: 0 1px rgba( 0, 0, 0, .5 );
 color: #fff;
 background: #000;
 -webkit-border-radius: 5px;
 -moz-border-radius: 5px;
 border-radius: 5px;
 border-top: 1px solid #fff;
 -webkit-box-shadow: 0 3px 5px rgba( 0, 0, 0, .3 );
 -moz-box-shadow: 0 3px 5px rgba( 0, 0, 0, .3 );
 box-shadow: 0 3px 5px rgba( 0, 0, 0, .3 );
 position: absolute;
 z-index: 100;
 padding: 2px 5px 2px;
}
 #tooltip:after {
  width: 0;
  height: 0;
  border-left: 7px solid transparent;
  border-right: 7px solid transparent;
  border-top: 10px solid #333;
  border-top-color: rgba( 0, 0, 0, .9 );
  content: '';
  position: absolute;
  left: 50%;
  bottom: -7px;
  margin-left: -10px;
 }
  #tooltip.top:after {
   border-top-color: transparent;
   border-bottom: 10px solid #333;
   border-bottom-color: rgba( 0, 0, 0, .9 );
   top: -17px;
   bottom: auto;
  }
  #tooltip.left:after {
   left: 10px;
   margin: 0;
  }
  #tooltip.right:after {
   right: 10px;
   left: auto;
   margin: 0;
  }
JavaScript Tooltip
<script>
/******* TOOLTIP*******/
$( function()
{
    var targets = $( '[rel~=tooltip]' ),
        target    = false,
        tooltip = false,
        title    = false;

    targets.bind( 'mouseenter', function()
    {
        target    = $( this );
        tip        = target.attr( 'title' );
        tooltip    = $( '<div id="tooltip"></div>' );

        if( !tip || tip == '' )
            return false;

        target.removeAttr( 'title' );
        tooltip.css( 'opacity', 0 )
               .html( tip )
               .appendTo( 'body' );

        var init_tooltip = function()
        {
            if( $( window ).width() < tooltip.outerWidth() * 1.5 )
                tooltip.css( 'max-width', $( window ).width() / 2 );
            else
                tooltip.css( 'max-width', 340 );

            var pos_left = target.offset().left + ( target.outerWidth() / 2 ) - ( tooltip.outerWidth() / 2 ),
                pos_top     = target.offset().top - tooltip.outerHeight() - 17;

            if( pos_left < 0 )
            {
                pos_left = target.offset().left + target.outerWidth() / 2 - 17;
                tooltip.addClass( 'left' );
            }
            else
                tooltip.removeClass( 'left' );

            if( pos_left + tooltip.outerWidth() > $( window ).width() )
            {
                pos_left = target.offset().left - tooltip.outerWidth() + target.outerWidth() / 2 + 17;
                tooltip.addClass( 'right' );
            }
            else
                tooltip.removeClass( 'right' );

            if( pos_top < 0 )
            {
                var pos_top     = target.offset().top + target.outerHeight();
                tooltip.addClass( 'top' );
            }
            else
                tooltip.removeClass( 'top' );

            tooltip.css( { left: pos_left, top: pos_top } )
               .animate( { top: '+=10', opacity: 1 }, 50 );
        };

        init_tooltip();
        $( window ).resize( init_tooltip );

        var remove_tooltip = function()
        {
            tooltip.animate( { top: '-=10', opacity: 0 }, 50, function()
            {
                $( this ).remove();
            });

            target.attr( 'title', tip );
        };

        target.bind( 'mouseleave', remove_tooltip );
        tooltip.bind( 'click', remove_tooltip );
    });
});
</script>
Cách sử dụng:
Chỉ cần thêm thuộc tính
title="nội dung tooltip" và
rel="tooltip" vào bất kỳ thẻ
html mà bạn muốn hiển thị tooltip
Ví dụ:
<abbr title="User Experience" rel="tooltip">UX</abbr>
Cách sử dụng cho blogspot
Chèn mã CSS vào trước thẻ đóng
</b:skin> và đoạn Javascript vào trước thẻ
</body> trong template của bạn
Lưu ý: Trong template phải khai báo thư viện
jQueryNếu chưa có chèn đoạn mã dưới đây trước thẻ </head>
<script src='//ajax.googleapis.com/ajax/libs/jquery/2.0.0/jquery.min.js'></script>